
Harvest Temple

Enrage: Expanding Void AoEs. During each Dragon phase, the squad has about 4m30s before all but a tiny ring on the edge of the platform is covered.
Recommended:, crowd control, projectile destruction/reflects This Strike Mission always takes place at
. Night
 Night
NightThe Harvest Temple encounter consists of many phases. In these phases, you will face a “pushing minigame”, each Elder Dragon, and various mobs.
Bring multiple sources of
While the fight itself does not have any enrage timers, there are soft enrage mechanics in the form of slowly expanding damaging areas of effect. The damaging areas will eventually expand to cover the whole platform; as it is impossible to outheal the damage this is effectively an enrage timer.
- During each Dragonvoid phase a dark orb will spawn in the center of the arena with the damaging AoE.
- During each Heart of the Dragon phase, four dark orbs with an expanding AoEs will spawn around the area instead of in the center.

In addition to heavy ticking damage, stepping in the AoE will apply stacks of the ![]() Influence of the Void debuff, lasting for three minutes. At 10 stacks, players will be constantly dazed and become an enemy of the squad. You will not be able to move and you’ll start attacking nearby squadmates. You will only have access to stunbreaks; stunbreaking and
Influence of the Void debuff, lasting for three minutes. At 10 stacks, players will be constantly dazed and become an enemy of the squad. You will not be able to move and you’ll start attacking nearby squadmates. You will only have access to stunbreaks; stunbreaking and
This debuff is applied by a variety of attacks in this encounter. Be mindful of any areas of effect left by the void (these are usually dark-green) and Dragon Heart explosions.
Heart of the Dragon
In this phase, you will have to push the Heart of the Dragon into white circular fields. Upon reaching a field the heart will change to that of a different elder dragon, and gain dragon-specific area attacks.
- Heart of Jormag: lightning attacks will spawn around the area
- Heart of Primordus: fire fields will spawn, inflicting heavy damage and
- Heart of Kralkatorrik: dark purple cracks will spread through the arena, charging (becoming light purple) and damaging players at detonation
These attacks will be the only source of damage in this phase and should be avoided. Your healers will be handling mechanics – avoid taking this unnecessary damage!
The Heart gains acceleration from any attacks. Commonly, players with quick attacks will handle pushing the Heart into the white fields while other players will be handling Veteran Void Melter adds marked with orange crossed swords spawning from the corrupted void spheres on the sides of the arena.
If a Veteran Void Melter reaches the Heart or if the Heart reaches the edge of the arena the orb will explode, releasing a damaging knockback across the entire arena. This can easily wipe the group. Players must prevent adds from reaching the Heart and prevent the Heart from reaching the edge of the arena to avoid this.
In addition to the heavy damage, each orb explosion will add a stack of the
Note: Be careful with pushing the Heart – it is easy to lose control of its acceleration, making it hard to change directions!! This is why groups typically assign only 1-2 players to push.
The Heart will stop after reaching each of the target white circles. Upon reaching the third circle the Heart of Kralkatorrik will gain a breakbar which must be broken to spawn the first dragon.
Jormag
Upon breaking the heart, the Dragonvoid will appear at the South of the platform, gaining a red circle. This is the indicator of the boss’ hitbox, not a damaging AoE – you are safe to stand inside.
Throughout the fight the Dragonvoid will take the form of different dragons, starting with Jormag.
During all Dragonvoid phases, the two players that are closest to the center of the platform will be targeted with dark-red timed areas of effect. In addition to gaining these circles, the players will gain a yellow border on their screen. These players should move away from the group to drop the AoE, and then quickly return to the group. Ideally, ranged DPS or ranged supports should bait this mechanic.
Players will usually choose to stack these AoEs to maximize safe space on the platform. Typically, it is safest to stack these on the left or right edges of the arena. However, during the last two Dragonvoid phases, Mordremoth and Zhaitan, players should place these close to the expanding danger zone in the center of the arena. This is because these phases are longer and therefore will have larger expanding danger zones – by dropping the red AoEs in the center squads can maximize their safe zone along the edges of the arena.
Spread
Occasionally, members will be targeted by a timed AoE. This detonation deals low damage to the targeted player but will down any additional players in their AoE. Any players targeted by these AoEs should move away from the group to ensure that no one else is in range of their detonation.
Additionally, during the Jormag phase, the Dragonvoid will spawn small and medium icy fields and beams that inflict
Primordus
After defeating the Jormag aspect of the Dragonvoid it will transform into its Primordus form. Destroyers will spawn across the arena but pose very little threat – the squad should stay by the Dragonvoid’s hitbox and cleave any adds that approach them.
Bite
Known as: chomp
In the Primordus phase, the Dragonvoid will periodically perform a bite attack, manifesting as an orange area of effect covering over half of the arena. Once fully expanded the boss will “bite” everyone standing in the zone and will leave a damaging AoE that will persist for a few seconds. The squad should immediately run to the safe zone, wait for the damaging area to disappear, and then return to the boss.
Smash
Known as: chin attack
After the first bite, the boss will do three smaller AoE attacks where he will smash his chin onto the platform. This attack can be avoided using
Unlike other iterations of the Dragonvoid, this phase has no other random AoEs.
Kralkatorrik
After defeating Primordus’ image, multiple Elite Void Brandbombers will spawn. These have ranged attacks and breakbars, making them more difficult to stack than the destroyers. However, it is still best to wait at the Dragonvoid’s hitbox and cleave these adds once they approach.
Lines
The Kralkatorrik Dragonvoid will cast large rectangular AoEs across the platform that do heavy damage to players. These attacks will alternate between two wide strips on the side of his hitbox to one strip in the middle of the hitbox. Stack with your squad and sidestep between safe zones.
Heart of the Dragon
Kralkatorrik is followed by another orb pushing phase. In this pushing phase, you will face new AoEs and an additional champion. Just as in the first phase, dedicated pushing players should push the Heart to the white zones while other players should handle spawning adds.
A Champion will spawn slightly west of the center. Players should quickly break its bear bar and strip
The champion has a Void Repulsion buff. Once she absorbs enough dark energy from a central AoE and projectiles around the arena she will shoot a slowly moving gravity attack that will pull players in and deal heavy damage.
In this phase, the Heart will have two forms with associated area attacks.
- Heart of Mordremoth: the Heart will shoot slow-moving damaging AoEs. These are telegraphed with an arrow, allowing players to easily sidestep the damage
- Heart of Zhaitan: the Heart will leave a dark-green lingering trail goop. This deals heavy damage; avoid walking through it! Resurrection utilities are invaluable here to retrieve any players that misstep into the trail. The trail persists for a short time after the breakbar on the heart is broken.
Mordremoth
Head Smash
Known as: boop
The Mordremoth Dragonvoid will smash its heads into the center of the arena three times, causing shockwaves that heavily damage and knock players back. These will coincide with the spread mechanic – getting knocked back into another player’s detonation or off the platform will down you.
The waves can be blocked, dodged, or jumped over. As there are three shockwaves you should aim to jump these – your two dodges are insufficient for avoiding the attack! Prioritize spreading and facing the center of the arena to watch for the shockwave to more easily jump this attack.
If you are unsure about the timing of the jumps, dodge the first one and try to jump the other two. This way even if you fail, you will still be in the downstate and resurrectable by the teammates, since getting hit by all three shockwaves will down and kill you.
When in Mordremoth form the Dragonvoid will also occasionally cast projectiles over the area. While this attack does relatively low damage, you should sidestep them to avoid putting unnecessary stress on your healers.
During this phase, small Void Skullpiercer adds will spawn. These shoot fiery lines from range and pose a very low threat as long as you avoid standing in these lines.
Note: it’s best to place the dark-red AoE mechanic near the center during this phase to leave as much space near the boss as possible to best
coverage.
Zhaitan
After Mordremoth, the Dragonvoid will take the form of Zhaitan and three Champion Void Giants will spawn.
These giants are one of the most deadly threats in this fight. Upon spawning, the Giants will cast AoE  "Stand Your Ground!"
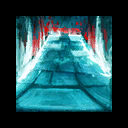 Inspiring Reinforcement
The Zhaitan Dragonvoid also has two attacks in quick succession as telegraphed by a very fast AoE half-circle, one of which applies  Dodge
Dodge
When coupled with the Giants spamming knockbacks and their damage, this can be a chaotic phase and is often where squads will wipe.
To handle the Giants and the Dragonvoid groups, prepare your Dodge
Each Giant spawns with a breakbar. Squads should try to stack multiple Giants and break their breakbar to burst them down. If a Giant spawns green goop the squad should reposition and switch to a different Giant.
The Dragonvoid will periodically cast two less threatening attacks.
Low damage projectiles will shoot across the platform, damaging players and leaving persisting
Lastly, four Zhaitan’s Reach snakeheads will emerge casting doughnut-shaped knockbacks. While these snakes can be killed groups typically ignore them as they despawn quickly.
Once the Zhaitan Dragonvoid is killed the final Heart will spawn.
Heart of Soo-Won
A Heart will spawn with a Champion Saltspray Dragon. This dragon should be focused on by the players first after which the pushing players push the Heart. Take care to avoid any remaining Zhaitan’s Reach snakes, as these will not despawn with phase change. Instead, they can be killed or allowed to despawn in their natural sequence.
While the Champion is not a significant threat it will experience a 30% damage reduction buff from Aerial Defense while in the air. The Champion can be grounded by breaking its break bar. If the Champion is allowed to move to Dragonvoid areas it will cast a gravity attack.
Small versions of previously killed Hearts of the Dragon will drift around the platform. Each of them will inflict
Soo-Won
In addition to the spread and targeted red AoE mechanics, players must avoid the mini-hearts and handle additional Soo-Won Dragonvoid mechanics including its Hand Slam and Tail Slam.
Note: Due to two attacks always hitting the left side, the squad should stack on the right side of the boss’ hitbox while players targetted by the dark-red AoEs mechanic should place them on the unused left side.
Hand Slam
The Dragonvoid will slam its hand down, releasing a cone of dark energy orbs and an expanding wave that knocks players back. This knockback is telegraphed by a small AoE near the group and should be avoided with
Tail Slam
The Dragonvoid will dip slightly and slam its tail on the platform, releasing dark energy orbs and a knockback wave. This knockback should be avoided similarly to the Hand Slam. This attack will coincide with two players targeted by the red-AoE mechanic.
Periodically, the Dragonvoid will cast a wide cone attack from its right hand. This is not very threatening but can overlap with other mechanics adding to the chaos of the fight. This can not be dodged, so prepare
Finally, the Dragonvoid will shoot projectiles over the whole platform. While these look very threatening the attack is very short and deals relatively low damage.
Void Amalgamate (50%)
At 50% health, the Soo-Won Dragonvoid will despawn and the final Heart will appear in the center of the platform. While this Heart is pushed similarly to other Hearts, instead of pushing this Heart into a white target circle the squad must DPS down the Heart.
Damaging orbs will shoot from the Heart – while each individual orb is not deadly, tanking multiple orbs can easily down players. These orbs can be absorbed or reflected.
The squad must balance killing the Heart with losing control of the Heart’s acceleration. You can split into subgroups and “ping-pong” Void between the groups, which is the most common strategy in random groups.
The most popular and safest strategy is to surround the orb while Alacrity Renegade will keep up the Ventari “bubble” on the Void constantly to deny all the projectiles around it to get out with  Protective Solace
 Legendary Centaur Stance
 Chapter 3: Valiant Bulwark
 Corrosive Poison Cloud
 Barrier Signet
Note: Unlike previous Hearts, if this Heart reaches the edge of the arena all players will go downstate. While it is possible to recover from this players should be extra careful in this phase.
Soo-Won (33%)
After killing the final Heart, the Dragonvoid will reappear with only 33% health and a Champion Wyvern will spawn. This Champion is usually ignored except for a shockwave ability it does, which you can bypass by having
Each mechanic of the previous phase reappears and they need to be dealt with in the same way.


