
The Silverwastes: Guide to RIBA

The Silverwastes ( ![]() Camp Resolve Waypoint ) is an explorable level 80 zone available to all players, including Free-to-play accounts.
Camp Resolve Waypoint ) is an explorable level 80 zone available to all players, including Free-to-play accounts.
It features a map-wide meta that runs through a continuous cycle of events.
- Foothold
- The Breach
- Mordrem Vinewrath
- Timeout
After the timeout period is over, the map will reset, allowing for a continuous farm without the need to switch maps.
Stage 1 – Foothold
Retaking and Defending the Forts

During this stage of the meta, players are required to capture, defend, and fortify the four forts on the map: Red Rock Bastion, Indigo Cave, Blue Oasis, and Amber Sandfall.
A popular acronym used to describe how this meta event cycle is done is RIBA. This refers to the order in which the events at the forts are completed. The squad will run around as a group, completing the events at each fort, one at a time. Ideally, this will ensure that every event can be tagged by a majority of players in the squad.
All forts will need to be captured at the beginning of the map reset. After capture, they must be protected in defence events. Each fort must also be fortified to Tier 3 by escorting supply Dolyaks between forts and repairing each fort’s walls by collecting rubble.
-

- Rebuilding event

-
- Escorting supply bull
-
- Defending the fort


Protecting each fort and raising the defences to Tier 3 will fill up a bar on the right-hand side of the screen labelled ‘Pact Assault Preparations’. This is a requirement for moving the map to the next stage.
Note: If a defence event fails, the fort will be retaken by the Mordrem. It will need to be captured and fortified again.

Legendary Mordrem
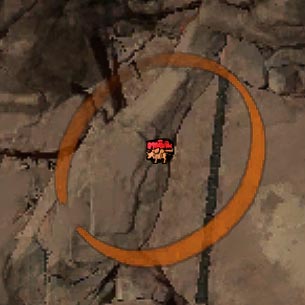
After a fort reaches Tier 3, during the fort defence events, 4 different Legendary enemies have a low chance to spawn.
Killing each one of them rewards a Central Tyria mastery point and an achievement.
You’ll earn the title “The Be-All and the End-All”, plus a fifth mastery point when you defeat all four.
Call them out in squad chat when you see them spawn and attack them with auto-attacks only so everyone has time to get credit.
Stage 2 – The Breach
When the Pact Assault Preparations bar is full, it’s important to quickly spread out for the second stage of the meta – The Breach. The squad needs to spread out evenly between each of the 4 forts to complete this stage!

Defeat Mordremoth’s Champions
Players will have 5 minutes to defeat 5 champions (2 spawn together at one fort). To reach these champions, interact with the hole that appears in the middle of each fort once the Breach begins.
You will be teleported into an underground area to fight the champion.
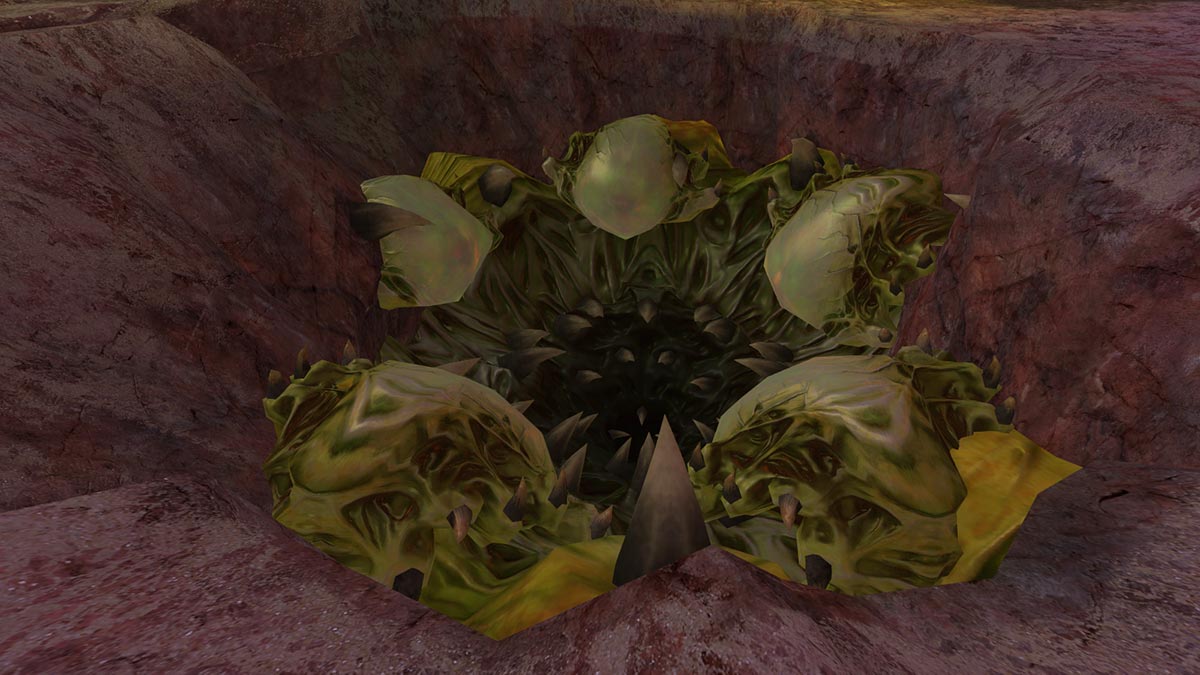
In each of the underground areas, you’ll fight a champion of the same type as during the Legendary Mordrem phase:
- Red Rock Bastion Champion: Copper Husk
- Amber Sandfall Champion: Iron Troll
- Indigo Cave Champion: Silver and Gold Teragriffs
- Blue Oasis Champion: Platinum Thrasher
Stage 3 – Mordrem Vinewrath
After all the champions have been defeated during the Breach, or if the five-minute timer has run out, the next stage of the meta will begin.
Pact choppers will begin flying siege carriers to the Mordrem Vinewrath, then a timer will start counting down.
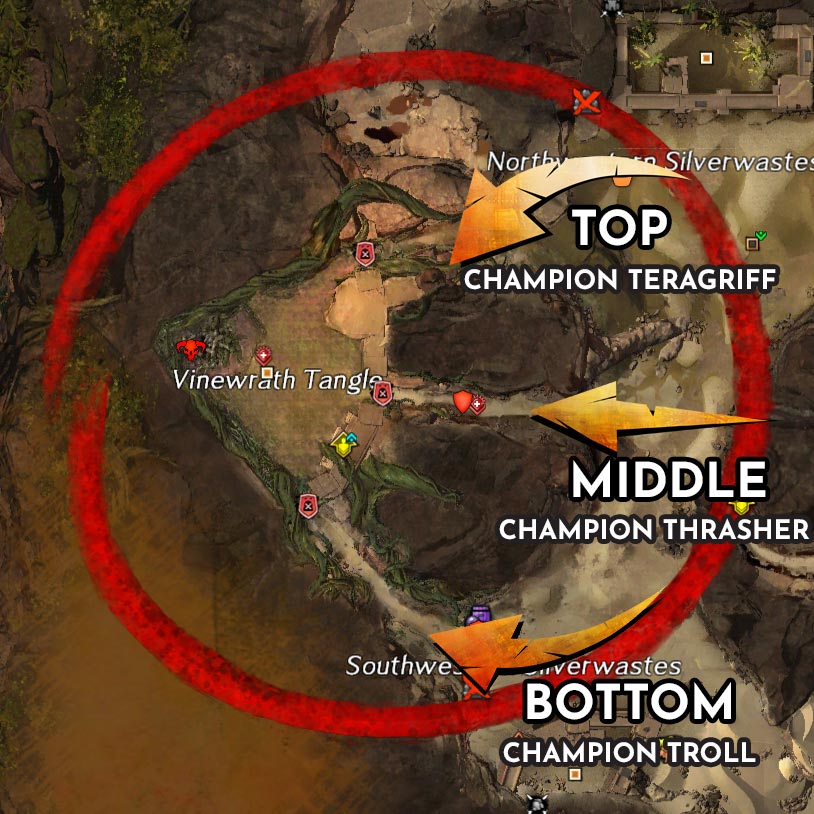
Players will have 3 minutes to proceed to the westernmost area of the map. The Vinewrath Tangle is where players should divide themselves evenly among the three lanes. They are typically referred to as top, middle, and bottom.
Defeating the Mordrem Vinewrath
Each lane will follow the same basic procedure to defeat the Mordrem Vinewrath. Only one lane at a time will be vulnerable to attack, starting with the bottom lane.
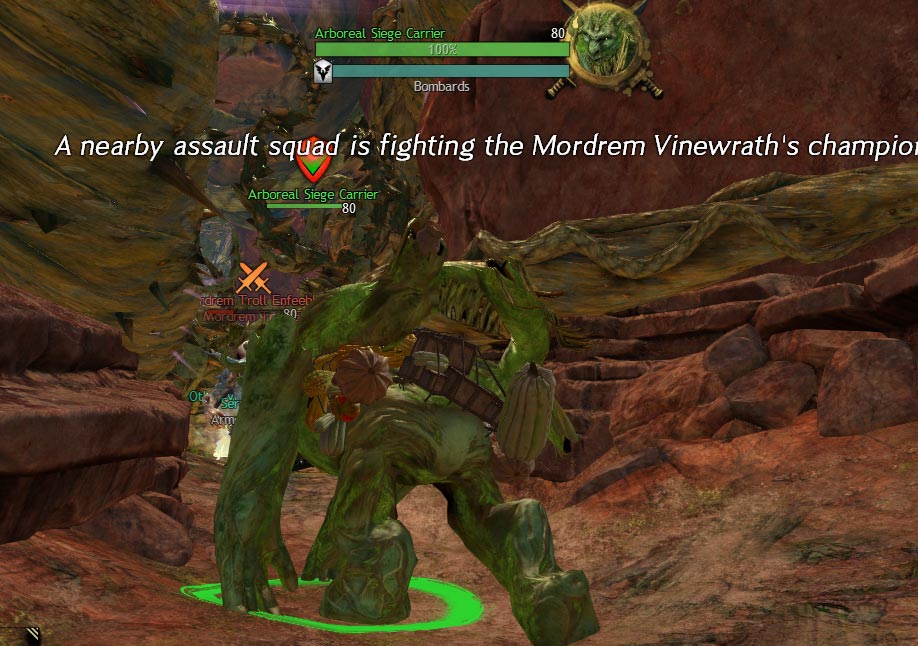
1. Escort the siege carriers to the vine walls
The siege carrier will walk back and forth, carrying ammunition towards the next vine wall. Protect it by defeating the attacking Mordrem, especially the enemies with crossed swords over their heads.
If 15 siege carriers are lost between all lanes, the event will fail.

2. Protect the ammunition pile from being destroyed
Throughout the event, Mordrem will attack the ammunition pile.
A few players should dedicate themselves to protecting it. If the ammunition pile is destroyed, players will have to rebuild it by collecting the ammunition from the surrounding area.

3. Defeat the champion when all vine walls have been destroyed
At the end of each lane, one of Vinewrath’s champions must be defeated within the specified time limit.
- Bottom: Champion Mordrem Beekeeper (Troll)
- Middle: Champion Mordrem Mangler (Thrasher)
- Top: Champion Mordrem Dark Wing (Teragriff)
Once you have defeated the lane’s champion, you must continue escorting the siege carriers and protecting the ammunition until the event concludes. When your siege carrier reaches the final vine wall again, it will not destroy it, but instead will grant all allies a variety of boons.
If a lane fails to defeat its champion, the Vinewrath will kill all three siege carriers and reset the lanes. The next lane will then have to contend with the undefeated champion.
You will receive ![]() Tracked for 7 minutes and 30 seconds after defeating a champion which will prevent you from helping the other lanes. You will be teleported out of the inner chamber if you attempt to enter.
Tracked for 7 minutes and 30 seconds after defeating a champion which will prevent you from helping the other lanes. You will be teleported out of the inner chamber if you attempt to enter.
Once all champions are defeated, a short cutscene will play, and the inner chamber will open for players to collect the final chest. The map will now progress to the fourth, and final, stage in the meta cycle.
Stage 4 – Time Out

The Tangled Labyrinth
Now that Mordrem Vinewrath has been defeated, a new area of the map will become accessible: the Tangled Labyrinth .
Starting from the Hidden Depths waypoint , follow the path to enter the maze.
Inside, you can collect lesser nightmare pods. Most importantly, use your  Key of Greater Nightmares
If enough players collect the lesser nightmare pods, the event will progress through three tiers. This gives all players on the map a buff called ‘Reaper’s Blessing’, increasing damage against Mordrem enemies.
Note: Be careful to avoid the Bioluminescent Lurkers that patrol the labyrinth as they are invulnerable to attack and deadly!
Lost Bandit Chests
The second part of the Time Out stage is finding Lost Bandit Chests using  Silverwastes Shovel
To uncover a chest, use Skill 2 (Sonar) until you see a pillar of light above a pile of sand. Use Skill 1 (Dig) on top of the sand pile. When a chest is uncovered, it will ping the location on the minimap for all players.

Usually, your shovel will break after digging up a chest. Be careful not to drop the bundle before using it, as it will still consume the shovel!
In most cases, typically the commander will use a stockpile of shovels to open the chests for everyone on the map.
The chests themselves are opened using  ((305140))
These chests spawn in fixed locations, you can check them on the wiki.
The Time Out period lasts 13 minutes, after which the map will reset to its initial state. The stages of the meta can be completed in sequence again.


