
Twisted Castle

Advised: Forsaken Thicket Waters mastery
Twisted Castle has many stuns and knockdowns. Revenants with 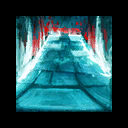 Inspiring Reinforcement
 "Stand Your Ground!"
In Twisted Castle players must activate 5 buttons (out of a possible 7 buttons) to clear the route to a bell. When the bell rings the encounter has successfully completed.
The encounter can be done “as intended”, but due to the complexity of the terrain there are multiple skips you can perform, and almost every group will attempt to utilize them. To help the group move between some platforms, Mesmers can bring  Portal Entre
 Ancestral Grace
Encounter Overview
The main killer of this map is gravity. Players cannot glide during the encounter, so falling from platforms will typically kill the player.
White Mantle enemies are scattered around the encounter, with
Additionally, Twisted Castle has a Madness mechanic, where players gain 1 stack of Madness every 3 seconds. If the player is staring towards the center of the castle, at the giant rotating statue, this will increase to 2 stacks every 3 seconds.

Every 10 stacks Madness will incur different effects on players. Most notably, at 99 stacks players will be instantly killed, without exception.
Fountains around the castle can be used to cleanse 10 stacks from players with Forsaken Thicket Waters, by using the “Dip your hands into the water.” The other choice, “Drink the water.”, will temporarily pause stack effects. Generally, removing stacks is preferable.
Haunting Statues are scattered through the castle and will chase players unless a player is staring at them. These can be knocked down, pulled, or pushed, but cannot otherwise be harmed. Walking into their areas of effect will teleport the player to the start of the route.
Group will have to work together by having someone staring at the statues to keep them stationary.
Traversing the Castle
There are a few different methods for traversing Twisted Castle. Over time, the community has defaulted to a common strategy that will be discussed here but know that other routes are also valid.
The encounter starts when the first group of enemies is killed on the starter platform.
While the main group is moving together, one or two players will split off from the squad to reach other buttons:
Button 1
Known as: far, left
Once through the first two portals, one player can take the northeast portal to reach a platform with a button, a fountain, and a portal on it. The player should stand on this button, then take the portal to return to the start of the route. They can then retrace their steps to reach the main squad or handle one of the other special buttons.
Button 2
Known as: skip
One player with a special movement skill can leap over a gap to hit this button. Most commonly this is handled by a Druid with Ancestral Grace
Other options for performing this skip are Elementalists with  Ride the Lightning
 Mirage Thrust
 Death's Charge
 Leap of Faith
 Rocket Boots
Main Squad
Meanwhile, after killing the first group of the encounter the main squad should take the newly activated portal on the left to run down a stairwell with ticking damage to take the portal at the bottom of the stairs.
Here the group will face a few mobs with knockdowns, after killing them, portals on either side of this platform will activate. The squad will take the southwest portal from this platform to reach a u-shaped platform with another group of mobs. These mobs should be cleared, and the squad can drop to the next platform.
From here, by standing on the inner corner of the left of the u-shaped platform, players can  Dodge
Dodge
A Mesmer with Portal Entre

Buttons 3 & 4
Dropping off the archway, players will find one button directly by the stairwell. Another button can be accessed after killing pack of mobs and jumping over floating broken wall parts.
Button 5 (& additional 6th)
One player, often one of the players that split away to handle Buttons 1 or 2, should take the portal on the left of the u-shaped platform. This player will need to pass by three haunted statues to reach the button – Ancestral Grace
Note: You will find an additional (6th) button here that can be activated in case any of the other buttons were missed.
At this point, all required buttons have been hit. The squad will find themselves at a platform with a fountain and a long path leading left. They should run left, bypassing Haunted Statues and White Mantle mobs, jump over a rocky area, and up a series of staircases to reach a final door. Interacting with this door will ring the bell, concluding this encounter.
Button 7 (additional)
If the squad is missing a button at the fountain platform, they can turn right to reach the additional (7th) button. A Druid using Ancestral Grace


