
Cairn the Indomitable

Enrage: 8 minutes. When Enraged, players cannot cleanse stacks of Unseen Burden.
Tank: Proximity (furthest)
Required: Glider Basics
Cairn does not require a dedicated tank.
Players can use

When entering Wing 4, players will come across Scholar Glenna and a path through a waterfall. One player should remain with Glenna while the rest of the squad should head through the waterfall and glide onto the boss platform.
Once the squad is ready, the player with Glenna should talk with her and pick her first dialogue option to get her moving, then run to join the squad on the platform. Once Glenna reaches the end of the path, Cairn will spawn.
Note: If the squad plans to fight Cairn with Challenge Mode enabled, the player that is left behind to activate Glenna’s dialogue should be the one to interact with the challenge mote as well—right before they glide to join the rest of the squad on the platform and Cairn spawns in.
Any player who lands on the boss platform after Challenge Mode has been activated will be forced to spam
Celestial Dash while waiting for the boss to spawn in order to avoid potentially being sent off by the
Countdown mechanic (see the Challenge Mode section for more details).
Mechanics
The battle with Cairn comprises a single, long phase. The boss will target the furthest player with some mechanics and its Meteor Swarm combo.
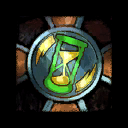
Many attacks in the encounter apply a stacking debuff known as ![]() Unseen Burden—for each stack (up to a max of 99 stacks), players’ movement speed will be decreased by 1%.
Unseen Burden—for each stack (up to a max of 99 stacks), players’ movement speed will be decreased by 1%.
Celestial Dash
For this encounter, all players have access to ![]() Celestial Dash, a ground-targetable special action skill that moves players to the selected position and also
Celestial Dash, a ground-targetable special action skill that moves players to the selected position and also ![]() evades attacks, allowing players to quickly reposition themselves and avoid many of the encounter’s mechanics.
evades attacks, allowing players to quickly reposition themselves and avoid many of the encounter’s mechanics.
Even if a player is slowed to a crawl or frozen due to ![]() Unseen Burden, this special action skill will still be available and functional.
Unseen Burden, this special action skill will still be available and functional.
Meteor Swarm
Known as: Shards
Cairn will attack in sets of three: two auto attacks then a Shard attack. These shards will apply stacks of ![]() Unseen Burden and
Unseen Burden and
Note that the Shaders setting in graphics options needs to be set to at least Medium for the compass to be visible.
Players should aim to stand as close to Cairn as possible to avoid this attack.
If any Shards are reflected, they will
Displacement
Known as: ports
Regularly, three red circles will spawn around the arena; any players standing in these circles will have a yellow border on their screen.
At detonation, any players inside these circles will take damage and will be teleported to a random location in the arena.
Like Vale Guardian’s teleports, this mechanic forms deadly combos with many of Cairn’s attacks (especially the
Players should either sidestep or  Dodge
Dodge![]() Celestial Dash to get back to the squad.
Celestial Dash to get back to the squad.
Spatial Manipulation
Known as: greens
Cairn will occasionally summon multiple green circles with shining gold orbs above them and charge up an arena-wide attack.
Any players not in a circle at detonation will take heavy damage, gain 25 stacks of ![]() Unseen Burden, and will be
Unseen Burden, and will be
Furthermore, each circle will only activate and provide reprieve from Spatial Manipulation if there are at least enough players inside to match the number of golden orbs above the circle.
Any time this mechanic is triggered after Energy Surge or Orbital Sweep, the green circles Cairn leaves behind will not have any orbs above them—there is no player requirement to make these specific circles active.
Any players in an active green circle at detonation will lose 25 stacks of ![]() Unseen Burden.
Unseen Burden.
This mechanic is often mitigated by using ![]() Unseen Burden.
Unseen Burden.
Shared Agony
Starting at 7:37 time remaining, and every 20 seconds afterward, Cairn will hit the furthest unafflicted player with Shared Agony. This player will gain a red aura and their character may call out that they have been hit.
The Agony only lightly damages the afflicted player, but will heavily damage up to three other players within its area of effect, meaning afflicted players must stay away from their squadmates. A maximum of three players can be afflicted at any given time.

Positioning themselves to avoid hurting their squadmates does not mean afflicted players have to subject themselves to Cairn’s Shard ![]() Celestial Dash to move to a green with a single orb: there will always be at least one.
Celestial Dash to move to a green with a single orb: there will always be at least one.
The first Agony is almost always baited by a healer, but subsequent casts of the mechanic should be grabbed by the squad’s other supports if possible.
Energy Surge
Cairn will occasionally teleport around the room and leave green circles in his wake, Dodge
Cairn will always use Spatial Manipulation after this attack.
Orbital Sweep
In later portions of the fight, Cairn may extend an arm across the platform and swing it counterclockwise. If hit, players will be dealt considerable damage and be
Players should get on the side of Cairn’s arm furthest clockwise, then time a Dodge![]() Celestial Dash to avoid its impact.
Celestial Dash to avoid its impact.
Cairn will always use Spatial Manipulation after this attack.
Gravity Wave
Starting at 25% health remaining, Cairn may start to use Gravity Wave after Orbital Sweep, sending three large waves of energy outward that
Players near Cairn are unaffected by this mechanic, so the squad should aim to stack as close to Cairn as possible.
Challenge Mode
Unlike most raid bosses, Cairn doesn’t get a health increase in Challenge Mode, and the mechanical changes are minor.
Countdown
In Challenge Mode, all players gain an effect known as ![]() Countdown, which ticks down from 10 seconds. If
Countdown, which ticks down from 10 seconds. If ![]() Celestial Dash is not activated by the player within this 10-second window, the player will be forced to dash in the direction their character is facing.
Celestial Dash is not activated by the player within this 10-second window, the player will be forced to dash in the direction their character is facing.
As the ![]() Countdown is active throughout the entire fight, players should cast
Countdown is active throughout the entire fight, players should cast ![]() Celestial Dash essentially off cooldown (or whenever there are gaps in their rotation) to counter this mechanic.
Celestial Dash essentially off cooldown (or whenever there are gaps in their rotation) to counter this mechanic.
Petrification
In Challenge Mode, once a player reaches 99 stacks of ![]() Unseen Burden, they will not only be unable to move but will be unable to use any skill besides
Unseen Burden, they will not only be unable to move but will be unable to use any skill besides ![]() Celestial Dash until their stacks are cleansed by standing a Spatial Manipulation green.
Celestial Dash until their stacks are cleansed by standing a Spatial Manipulation green.
This variation on Unseen Burden makes the


