
Boneskinner

Enrage: 10 minutes. When Enraged, the squad dies
Bonus Chests: 3 and 5 minutes
The Boneskinner is a notoriously punishing strike. While mechanically simple, each attack hits hard and the common approach of ignoring arena mechanics will put more pressure on the group with each minute of the fight.
Torches
The Boneskinner’s arena is surrounded by six lit torches. Throughout the encounter, the Boneskinner will put these torches out. Each lit torch will reduce a tormenting pool surrounding the Boneskinner, so as the Boneskinner puts out more torches the squad will face increased damage pressure.
Dark torches can be interacted with to re-light them, but practically no squads will ever actually keep the torches lit. Instead, squads will bring additional healing or damage mitigation skills to tank the increased damage from dampened torches.
Boneskinner
This fight will begin when the first player crosses into the Boneskinner’s circular arena. Shortly into the encounter the Boneskinner will use its most deadly attack, Grasp.
Grasp
Orange circles will spawn under every player’s feet, quickly converting to a black grasping pool. These pools do very, very high damage. Typically standing in one is a one-shot.
Squads should tightly stack and move left once the boss raises its arm and orange indicator circles have spawned.
Move as little as possible to maintain as much safe ground as you can.
This is by far the most dangerous attack in this strike. In addition to downing any unfocused players, this mechanic punishes squads that are not tightly stacked – as the AoEs spawn under all players, a few players not on stack drastically decrease the safe area.
Because AoE under your feet can be hard to spot, you should focus on the Boneskinner itself – it will very clearly raise its right arm just before the attack.
Less experienced squads will often bring a Heal Scourge to teleport downed players caught by the Grasp.
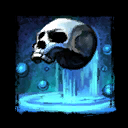
Wisps
The Boneskinner will occasionally gain a breakbar, stand up, and summon Veteran Aberrant Wisps. These Wisps will extinguish torches and attack the squad with projectiles. Leaving Wisps alive will increase the damage of aura ticks. You should use large area pulls like  Temporal Curtain
 Spectral Grasp
Note: A popular misconception is that taking reflects will help the squad. In reality, the Wisps auto-attacks deal marginal damage.
Additionally, players will gain a special action skill when the Boneskinner gains its breakbar. The squad should use crowd control skills and their special action skill to quickly break the Boneskinner’s breakbar, preventing an excess of Wisps.
The Boneskinner will have a few other attacks that are mostly only deadly due to their interaction with Grasp.
Cascade
At the start of the encounter and periodically throughout the fight the Boneskinner will slam an orange cone down. Players in this cone will be stunned for a long time – stunbreaks and
While the attack itself doesn’t do much damage, when combined with Grasp it can be lethal.
Note: Even if you are caught in stun from Cascade you can still
out before the following Grasp spawns if you do so immediately after the stun expires. Dodge
Jump
The Boneskinner will jump around the arena, pulling the squad into the center. A dark red circle will expand outwards from the center of the arena; when it fills the Boneskinner will jump back and heavily damage players.
You should  Dodge
Dodge


