
Gorseval the Multifarious

Enrage: 7 minutes. When Enraged, the updrafts around the arena will disappear and Gorseval will deal 200% more damage.
Tank: Toughness
Requires: Updraft Use Mastery
Gorseval aggros on a toughness tank. No special utilities are required for this role, however, as  "Stand Your Ground!"
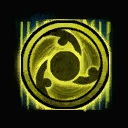
 Vine Surge
 Entangle
Staff

 Recommended
Mace & Warhorn


Fight Overview
Gorseval comprises three main phases with two additional split phases at 66% and 33% of its health remaining. The boss will add a new mechanic with each phase.
The encounter will always start with Gorseval standing in the center of the arena. When players walk past a certain threshold, Gorseval will aggro on the tank and the encounter will begin.
The tank should point Gorseval away from the squad and keep him stationary. At the end of split phases, the tank can return to Gorseval early to ensure he doesn’t walk towards the stack.
Occasionally, adds will spawn around the arena, knocking down players and potentially stripping  Into the Void
Spectral Impact
Known as: Slam
Gorseval has two auto attacks: a Swipe and a Slam. Slams only ever happen after Swipes.
The squad should stand behind Gorseval to avoid each Swipe, but be prepared to  Dodge
Dodge
Ghastly Rampage
Known as: cc phase, breakbar phase
Once per phase, Gorseval will start his Ghastly Rampage. During Ghastly Rampage, Gorseval will obtain a defiance bar and an  effect
Every few seconds, the goop will detonate, dealing large damage and applying 25 stacks of dodged
During this phase, players should use crowd control skills on the boss, avoid using multi-hitting skills with high strike damage to avoid dying to the damage reflect
Commonly, squads with adequate DPS utilize a “Fast, Fast, Slow” strategy during the breakbar phases. In this strategy, the squad should quickly break the first two defiance bars, but should wait to break the final defiance bar until Gorseval’s health has reached about 18%. This offers players more leeway to kill Gorseval before the final World Eater. Any classes that can utilize damage negation or heal-on-hit effects like 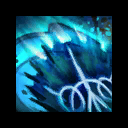 Litany of Wrath
World Eater
After breaking Gorseval’s defiance bar, players must DPS Gorseval to a health barrier—66%, 33%, or 0%—or else deal with Gorseval’s ultimate attack.
If Gorseval has not been phased by the end of his attack pattern, he will channel World Eater, an expanding red area of effect. If this attack reaches the edges, any player standing in the arena will be instantly defeated.
Players can avoid this attack by either DPSing Gorseval to a one of his health barriers or by destroying a section of the wall around the arena, gliding to one of the four updrafts surrounding the platform, and returning to the platform after World Eater has completed.
While most squads have adequate DPS to ignore the World Eater mechanic, if the squad has lower DPS, has lost players, or has struggled with mechanics, the squad may need to break a wall. In this case, all players should run to one wall, break it down, and glide to an updraft. Each updraft can only be used one time, so the squad must move to a new updraft each time.
Charged Souls
Known as: split phase
At 66% and 33% HP remaining, Gorseval will become invulnerable and four Charged Souls will appear, slowly walking towards him. If a Charged Soul reaches Gorseval, he will channel a World Eater attack.

Usually, squads will either zerg down all four Charged Souls starting from the northwest, or adopt a split strategy, with subgroup 1 engaging the two northern Charged Souls (1 then 2, if going by the image) while subgroup 2 defeats the two southern Charged Souls (4 then 3).
Spectral Darkness
Known as: orbs or deaxon
Starting at 66% HP remaining, dark orbs known as Spectral Darkness will spawn around the arena. These orbs slowly expand their area of effect over time.
Touching an orb’s AoE will apply 10 stacks of the  Spectral Darkness
To remove accumulated stacks, players must first destroy an dark orb, which will then spawn two golden energy orbs on the ground to pick up: each will clear 5 stacks of Spectral Darkness
All players with ranged damage are responsible for clearing any orbs that spawn close to Gorseval and the Charged Souls—don’t assume that someone else will do it! If you are afflicted with Spectral Darkness
Ghastly Prisons
Known as: eggs
Starting at 33% HP remaining, Ghastly Prisons will spawn under every player and attempt to trap them and lock their skills. This attack cannot be dodged
If any players are caught, they can be broken out by using their Weapon Skill 1 key and with cleave damage from the rest of the squad.
To deal with this mechanic effectively, the squad should stack tightly before the eggs spawn, and once they appear, players should sidestep out of their range.


