
Samarog

Enrage: 11 minutes. When Enraged, Samarog will deal 500% damage.
Requires: Crowd control, pushes, and immobilizes
Tank: Proximity
Samarog is a low-to-medium difficulty boss that doesn’t have a large number of mechanics, but places an importance on positioning and control. Power damage is preferable on this encounter as it consists of many short phases; Samarog will gain a defiance bar at 10% health intervals, making him immune to damage and preventing new conditions from being applied. Consequently, this fight has a high crowd control requirement and all players should consider adjusting their build accordingly if the squad is struggling to break the defiance bars. For example, Guardians can take  Sanctuary
 Signet of Humility
 Basilisk Venom
Samarog’s moveset also contains dangerous  "Stand Your Ground!"
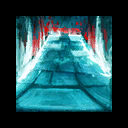 Inspiring Reinforcement
 Recommended
Hammer

Axe & Pistol
- Recommended
Staff
Staff


To reach the boss, players must first unlock the door to his arena. The door is located to the west of Mursaat Overseer's platform, and players must collect four keys to open it. Players must first interact with the door and then with four piles of rubble to find each of the keys. Piles will only become visible if you have interacted with the door and are near the pile. Alternatively, any Thief character can pick the lock on the door, skipping this puzzle.
The Arena
Samarog’s arena is surrounded by spears. Standing in these spears during the fight will deal damage over time, and getting
Several of Samarog’s skills are knockbacks, so players should be ready to  Dodge
Dodge
Phase 1 (100%-66%)
Fixation/Tanking
When the fight starts, Samarog will fixate on the player closest to him. After this initial target, he will fixate on the player furthest away from him. A new fixate will be chosen after every defiance bar and after every split phase, and also if the current fixate dies or goes downstate.
The current tank should hold the boss in the middle of the arena to give the squad the most room to maneuver; this will make avoiding Samarog's attacks easier and will also mean that should a player get hit by one of his knockbacks, they will be less likely to fly into the spears around the edge of the arena. The rest of the squad should stack behind Samarog.
Brutal Aura
Samarog will passively damage all players for about 900 damage every 3 seconds.
Shockwave
Samarog will rear up and slam his spears into the ground, emitting a shockwave that Dodge
Prisoner Sweep
Known as: swipe
Samarog swings his spears in arcs in front of him,
This attack consists of 2 swings; players who plan to Dodge
Brutalize
Every 10% of his health, Samarog will leap onto the current tank, become immune to all damage and gain a defiance bar. The rest of the squad must CC the boss to save the fixated player.
During this attack, new conditions can not be applied to Samarog. This means that soft CC such as
The fixated player can be healed to extend the time the squad has to break the defiance bar.
Once the fixated player is rescued or fully dies, Samarog will fixate again on the furthest player.
Spear Impact
Every 20 seconds, Samarog will summon a large spear onto the arena. These are telegraphed as red circles that fill over time until the spear lands, dealing massive damage to players upon impact. The spears will persist on the ground, dealing heavy damage and applying
Players can clear the spears from the arena by killing them or by breaking their defiance bars; this is rarely necessary but if the situation arises, the squad should avoid wasting their CC on the spears and instead simply DPS them down. The squad can also cleave the spears while hitting Samarog to minimize downtime damaging the boss.
Split Phase 1
Upon reaching 66% health remaining, Samarog will retreat into the alcove on the western edge of the arena and two adds will spawn. Players must push the smaller add, Rigom, underneath Samarog while killing the larger add, Guldhem.
Guldhem and Rigom are shielded and have a damage-sharing mechanic. Damage done to Guldhem when his shield is up will transfer to Rigom, manifesting in a large damage explosion when Rigom reaches zero health. Rigom will then heal back to full health. If Rigom’s explosion hits Samarog, Guldhem will lose his shield, allowing the squad to kill him. Additionally, if the adds are near each other they will receive less damage and deal more damage.
Guldhem's autoattacks are not very threatening, but every 20 seconds he will target the furthest player with an AoE stun that deals heavy damage. A player can bait this attack, but typically squads will just Dodge
Rigom can be singlehandedly controlled by a  Druid
Druid Glyph of the Tides
 Point-Blank Shot
 Natural Convergence
 Entangle
 Vine Surge
 Jacaranda's Embrace
However, having a Druid is by no means a requirement and any class with  Chains of Light
 Temporal Curtain
 Into the Void
Every 33% of Guldhem’s health he will regain his shield, so if Rigom is not immobilized he must be pushed back under Samarog to restrip Guldhem’s shield. Once Guldhem is killed, Rigom can be killed to end the split phase.
Phase 2 (66%-33%)
This phase is the same as Phase 1, with two additional mechanics: Inevitable Betrayal and Spear Return.
Inevitable Betrayal
Known as: friends, buddies, donut
Every 25 seconds, Samarog will target two random players with Inevitable Betrayal, both of which will see a message saying "Choose your allies wisely..." on their screen.
One player will have a large orange circle, and the other player will have a small green circle. These two players must stack on each other, or the player with the large circle will take heavy damage, potentially downing them. Any other players who are in the large circle at detonation will take the same heavy damage.
The player targeted by the larger circle should exit the group and stop moving to allow the smaller circle to stack on them. These two players should be cautious of Samarog’s knockback attacks during this mechanic, either by standing behind the boss, jumping over shockwaves, blocking or by using
Spear Return
Samarog will occasionally pull all summoned spears to himself if there are too many of them on the arena. This will be telegraphed by large red arrows and can be dodged, blocked, or simply avoided.
Split Phase 2
Upon reaching 33% health remaining, Samarog will again retreat into the alcove. Rigom and Guldhem will return and have to be dealt with in the same way as in the first split phase. There is one difference, however: Inevitable Betrayal will remain active during this phase. Players should handle this mechanic as normal; the player with the large circle should run out of the group, then stand still and allow the small circle to stack on them.
Phase 3 (33%-0%)
After dispatching Rigom and Guldhem for the second time, the final phase will begin. This phase is the same as Phase 2, with one additional mechanic.
Bludgeon
Samarog will slam one spear on the ground in front of it, dealing massive damage and
Other than this extra attack, there is nothing different about the final phase. The squad should continue to hold the boss in the middle while stacking behind him and handling Inevitable Betrayal, until he is defeated.
Challenge Mode
Samarog gains a considerable difficulty increase when the Challenge Mote is activated. His HP is increased by 10 million and while he does not gain any new mechanics, his existing attacks become more deadly.
Spear Impact happens much more frequently, and follows a set pattern. Furthermore, the spears cannot be destroyed and remain on the arena until Samarog pulls them in.
Spear Return is active from the start of the fight as a result. Spear Return will be cast once all 12 Spear Impacts have been summoned onto the arena.
Inevitable Betrayal is active from the start of the fight, and the player targeted with the large circle will be unable to move. The player with the small circle must therefore join them on their position to prevent the damage to their squadmate. In addition, this attack now summons an additional Spear Impact on the location of the large circle.
These changes drastically alter the structure of the fight. Since the arena quickly becomes covered with spears and they can not be destroyed, it is no longer possible to simply hold the boss in the middle. Furthermore, since every Inevitable Betrayal results in another spear on top of the squad it is also not possible to tank the boss in any single location; the squad must constantly reposition when the available space on the arena shrinks.

Squad positioning
The most common way to approach this encounter is to move in a rectangular pattern between the spears dropped by Spear Impact, starting on the northern edge of the arena.
The general strategy for fighting Samarog remains the same as in normal mode; the current tank should hold the boss still while the rest of the squad stacks behind the boss. However, the squad will have to be much more mobile.
Whenever Inevitable Betrayal occurs, the current tank should move the boss to the next group position. Furthermore, since the player afflicted with the large circle can not move, jump or dodge, they are extra vulnerable to Samarog's other attacks; a Shockwave or Prisoner Sweep being cast at the same time could have dire consequences. This makes
The fight will immediately start when a player enters the arena. In order to to get to the starting position without triggering the boss, the squad should move through the spears surrounding the arena. This will allow the squad to begin the fight in a preferable location, and the spears do not begin dealing damage until the fight has started.
Spear Impact patterns
As mentioned above, Spear Impact happens much more frequently in Challenge Mode and the spears will spawn in a predetermined order. A spear will be summoned every 5 seconds and there are 4 different patterns that repeat; the full sequence can be seen here. However, the specifics of this pattern is not particularly important and does not actually impact the strategy for the fight! The squad does not need to know what pattern they are currently on, nor do they need to know what that current pattern looks like; they should simply keep moving in the fashion described above, regardless of where the Spear Impacts are dropping.
Split Phases
The 66% and 33% split phases in Challenge Mode are conceptually the same as in Normal Mode. However, just like in the boss phases, the squad will have much less room to maneuver when controlling Rigom and killing Guldhem. The Spear Impacts will keep dropping and Inevitable Betrayal remains active, further reducing the available space on the arena; since a Spear Impact will drop on the player afflicted with the large circle and since that player unable to move out of the group, the group will have to reposition instead.
All in all, this will mean there will be very little open space around the alcove which makes pushing Rigom into Samarog more difficult. It should still be doable without too much trouble, but if the squad finds themselves in an unmanageable situation they can simply back off and wait until all 12 Spear Impacts have landed on the arena; Samarog will pull them in with Spear Return and give the squad room to maneuver again.


