Cardinal Adina

Enrage: 8 minutes. When Enraged, Adina will deal 200% more damage.
Tank: Toughness
Recommended: Projectile Mitigation and/or
Although almost all group PVE builds (both damage- and support-wise) are decent choices for this encounter, the relatively low health thresholds for each of Adina’s invulnerability phases bias the encounter slightly towards power builds. Furthermore, the Tectonic Upheaval mechanic forces five players in the squad to move away from the boss for a few seconds at a time, meaning having a couple of ranged damage or support builds will improve the squad’s damage output immensely during each phase.
 Recommended
Greatsword

 Low intensity
 Weapon Mastery
Axe & Axe


 Recommended
Hammer

Two final considerations for squad composition are ready access to projectile destruction and  Herald
 Firebrand
To reach Adina’s arena from the Leystone Axis, players should head east. Here, they will encounter five Pillars and an hostile Earth Elemental. The squad must kill this Elemental to progress.
The Earth Elemental will introduce a mechanic that will be present during Adina’s fight, Boulder Barrage, an attack that will down any players not hiding behind a pillar. Each pillar can take two barrage collisions total. This means two players hiding behind a pillar one time or one player hiding behind a pillar two times will break it. Each pillar broken will remove 10% of the Elemental’s health, so players can damage the earth elemental by simply hiding behind each pillar. Alternatively, it is possible to burst the elemental down before it is able to use its Barrage.

Adina will be standing in an arena composed of hexagonal blocks. Outside of the blocks is quicksand which heavily damages and blinds players.
Before the fight begins, five Pillars will surround Cardinal Adina. Walking inside the pentagon formed by the pillars (or attacking Adina) will start the encounter.
Adina
Adina will start the fight with two mechanics: Diamond Palisade into a Boulder Barrage.
Diamond Palisade
Adina will launch Diamond Palisade, a rippling attack that damages all players and Pillars. The damage from this attack at the start of the encounter can be negated by being mounted up.
Boulder Barrage
Immediately after Diamond Palisade, Adina will spawn an expanding orange circle. When this reaches the edge of the arena she will unleash Boulder Barrage. Any players hit by this attack will go downstate.
Each Pillar can tank two hits of Boulder Barrage. Therefore, to avoid dying to this attack, two players should stand behind each Pillar.
Throughout the encounter, players will need to hide behind their Pillars. To avoid confusion (and the downstate), players should remember the position of the Pillar they originally stood behind. The exact locations of the pillars will move each time, so before the fight begins, players should count (either clockwise or counterclockwise, but be consistent!) how far their pillar is from the tank’s Pillar.
Commonly, the tank will hide behind the Pillar just to the left of their initial tanking position.
Note: newer groups will often mark the platform and specific players to help everyone remember where their Pillars are. However, we don’t recommend relying on this strategy as it makes it difficult to adapt if anyone dies or misplaces a Pillar. Instead, practice committing your Pillar’s relative position to the other four (or as mentioned above, at least the tank’s) to memory in order to adapt to any scenario.
Once the first set of Pillars have been broken, the squad can stack on Adina and begin attacking her.
Tectonic Upheaval
Occasionally the five furthest players (excluding the tank) will be targeted with Tectonic Upheaval, which spawns an expanding orange circle beneath their character. When fully expanded, the circle will lock on the closest hexagonal tile; soon after, a Pillar will erupt at its location.
Often groups will assign Pillar Baiters to bait this mechanic: five players who will stand slightly away from the boss to bait Tectonic Upheaval. These players must then back up, wait for the orange circle to lock, then quickly return to the boss. Usually, support roles and players with ranged attacks or high mobility skills will be chosen for this.
Note: new players will sometimes stand very far from the group to try to bait Pillars, and not return once Pillars are placed. This means that they will not benefit from the squad’s boons. Instead, Pillar Baiters should stand at max melee range from Adina, and non-Pillar Baiters should stand practically within her hitbox.
If a player remains on their Pillar circle when it rises, they will be instantly defeated. Additionally, if a Pillar spawns too close to Adina any players standing near her will gain an uncleansable blind. Players targeted with Tectonic Upheaval must take these off of the boss to avoid killing or blinding the squad.
Finally, if a Pillar overlaps another Pillar one of them will be destroyed.
If you are not assigned to baiting Pillars but happen to get one anyways, you must react and adapt by taking your Pillar of of stack and placing it between the other Pillars to minimize confusion.
Radiant Blindness
Soon after Tectonic Upheaval, Adina will do her Diamond Palisade and Boulder Barrage combination attack, with an added Radiant Blindness. She will raise her arms, say a voice line, and gain a shining Eye over her head. Any players looking towards her will receive a 20 second uncleansable blind. Everyone should quickly run to their Pillars and wait for this attack to end.
While you can keep uptime on the boss when she first says her voice line, the blind is extremely long and should be avoided at all costs. It is safest to just quickly run to your Pillar if you are new to the timing.
Adina will gain a buff for each damaged Pillar on the arena. If players fail to stack behind the Pillars they will fail to break those Pillars, building stacks of Pillar Pandemonium. Each stack increases her outgoing damage and decreases her incoming damage by 20%. Therefore if any Pillars did not break, the Pillar Baiters should break these with their next Pillar placements by placing a Pillar on an adjacent hexagon.
If two players are fully dead only four Pillars are required for the eight remaining players to survive Boulder Barrage. Therefore two Pillar Baiters should merge their Pillars to reduce the number of stacks of Pillar Pandemonium on Adina.
Pillar Baiters should reduce the number of pillars that spawn using this technique for every two dead players. So for example, if five or six players are alive, the Baiters should work together to ensure only three Pillars spawn.
Adina has a number of attacks that are completely avoidable by the squad and only handled by the tank. These include Perilous Pulse and Stalagmites.
Perilous Pulse
Known as: cones
An orange cone will appear in front of Adina. This will knock back any players in it if not blocked, dodged, or negated by
The tank can simply block this knockback. All other players should never be standing in front of the boss.
Stalagmites
Known as: mines
Mines will spawn in blocks behind the tank. Touching these mines will cause them to detonate, heavily damaging players in range and destroying the ground beneath them.
Players should never walk through these mines. The tank can avoid them by standing in Adina’s hitbox and using
Each time you will phase Adina, the platform layout will change:
Split phases
Sand Wall
Every 25% Adina will become invulnerable and spawn a Sand Wall reaching from the south to the north of the arena and rotating counterclockwise. It will instantly kill anyone stepping in its path.
Players must run counterclockwise around the arena to avoid dying to the wall and should stop at the northwest of the arena. Arena itself will change slightly
Hands
After Sand Wall will complete a full circle, two Hands will spawn in corners of the platform: a Hand of Erosion and a Hand of Eruption. During 50% and 25% split phases, four of them will spawn, two of each type.
The Hand of Erosion will apply a vulnerability debuff while the Hand of Eruption will knock players back. Players should quickly kill the Hand of Erosion while blocking the Eruption projectiles using  Protective Solace
 Feedback
 Shield of Absorption
 Chapter 3: Valiant Bulwark
 Corrosive Poison Cloud
If your squad appears to be lacking projectile mitigation you must watch the Hand of Eruption and  Dodge
Dodge
Commonly during 50% and 25% split phases, the group will choose to start killing hands from the south-east so tank can get back to his starting position with Adina facing south without interfering with the group.
During each hands phase, between boss phases platform will change into more narrow layout:
Walking from the south to the north requires players to walk a fine line. Players must use projectile mitigation or stability to avoid dying to the knockbacks from the northeast Hand of Eruption.
The bridge from the south to the north during last Hands phase will require a jump. Players should be extra careful about knockbacks from the northeastern Hand of Eruption, or can bypass this completely by using 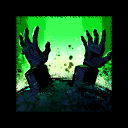 Sand Swell
Apart from split phases, Hands of Erosion will spawn during the last boss phase. Players should aim to kill Adina quickly to prevent the vulnerability debuff from piling up. Projectile mitigation can help lessen the pressure from this debuff.

