
Game basics – first steps in Tyria
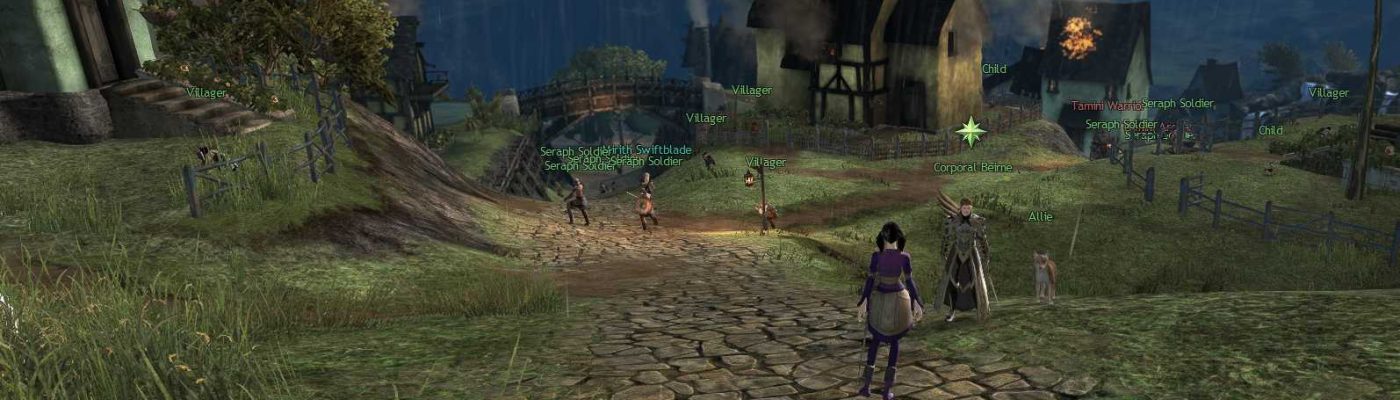
After character creation, you will start your personal story in your race’s starting zone. Follow the green markers (![]() ) and help your allies to finally emerge in the world of Tyria.
) and help your allies to finally emerge in the world of Tyria.
All MMO games have new systems to learn, new icons, new markers, and new types of quests. Guild Wars 2 is no different, especially with the game’s unique spin on many classic MMO systems. At the start, this can be overwhelming! However, the game does give players some consistent direction to learn the ropes.
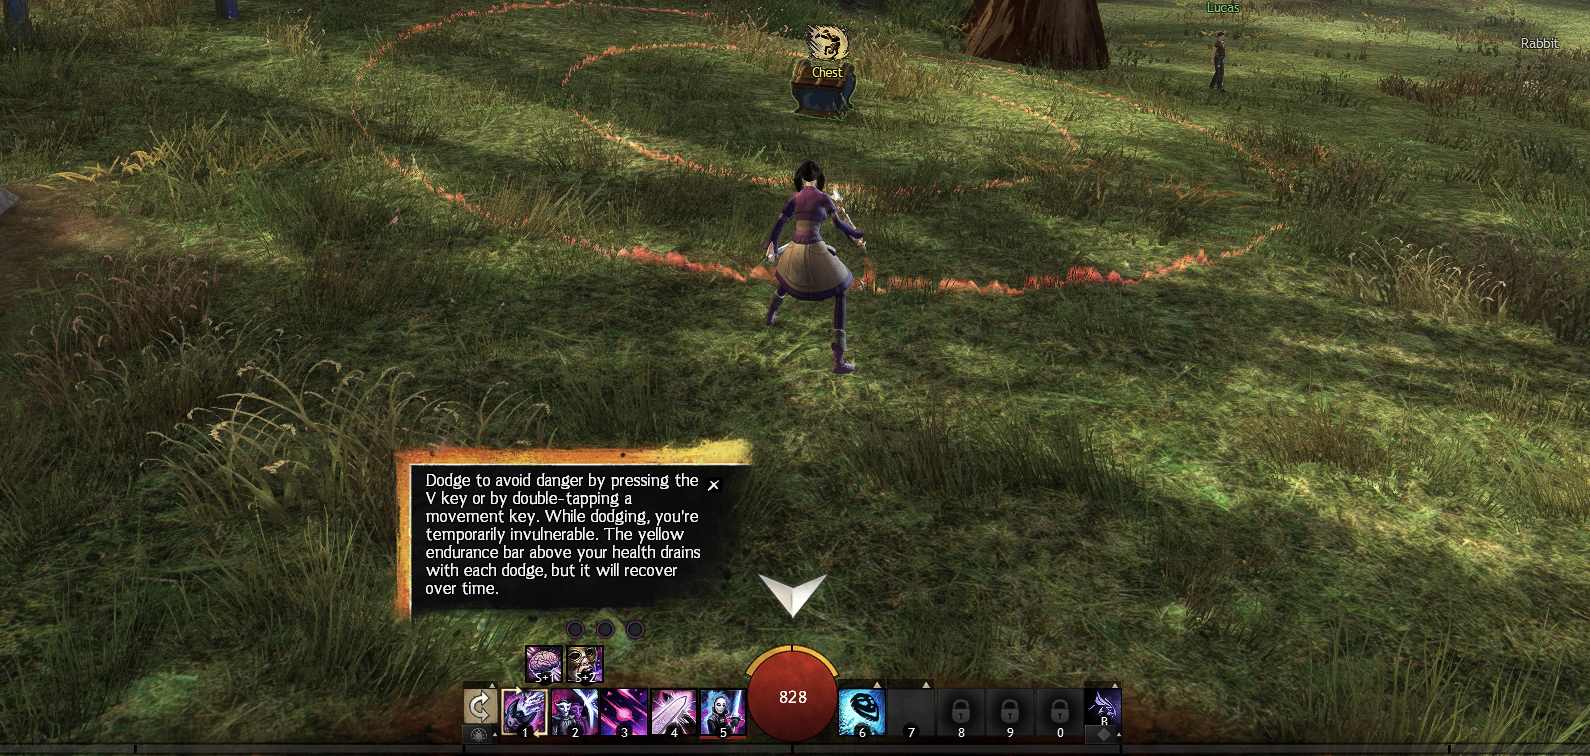
Throughout Guild Wars 2, multiple useful hints will pop up on your screen.
Don’t ignore them, as this is the game teaching you about important aspects of gameplay, such as  Dodging
Content Guide
The “Content guide” in the upper right corner of your interface will offer suggestions on where to go next. It will change based on your location, informing you about what you should do to complete dynamic events near you, your next story step, or where to go to unlock new Points of Interest on the map. If you are lost or not sure what to do, always check this first.
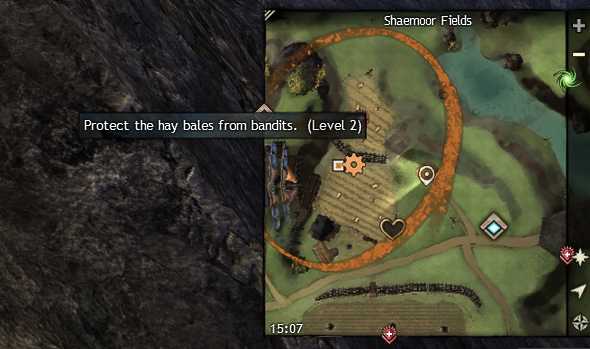
Supplementing the “Content guide“, your minimap will show you what is happening close to you. Certain icons on the map you’re currently on will “stick” to the edges of your minimap, indicating the direction of the nearest Commanders, personal story instances, undiscovered map zones, and Points of Interest.
Your personal story may suddenly stop, neither showing up in the Content guide nor guiding you with
icons.
This means you need to level up to meet the requirements for the next chapter. Look for a new personal story chapter every ten levels starting at level 10!
Leveling
Speaking of leveling, in Guild Wars 2 you will get experience for almost all activities you can think of: killing enemies, resurrecting NPCs and allies, map completion, the personal story, dynamic events, and a unique mechanic to this game called Renown Hearts.
Hearts function as a modified side-quest system: they are scattered around the map tied to specific locations (indicated by ![]() ), but unlike other games, they don’t require you to interact with an NPC to accept or finish the heart. Instead, you only need to stay in their zone, complete the tasks described by the “Content guide” (upper-right corner) and fill up the orange bar to receive your reward.
), but unlike other games, they don’t require you to interact with an NPC to accept or finish the heart. Instead, you only need to stay in their zone, complete the tasks described by the “Content guide” (upper-right corner) and fill up the orange bar to receive your reward.
There is no single way to level up: it’s best to do whatever interests you rather than burn out doing stuff that doesn’t. New players will often follow the personal story and do map completion in-between chapters. Ultimately “just play” is the best way to level your first character in GW2.
Note: The longer an enemy is alive, the more experience it will give when defeated. To level up as fast as possible, look for any creature with a yellow name, as they’re passive until attacked first and therefore aren’t killed as often.
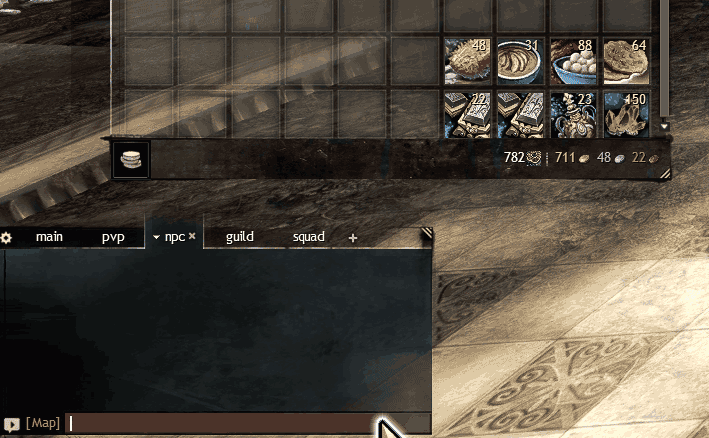
Basic interface
The game interface in GW2 is simple and clean. You can’t adjust the position of most elements, but some can be swapped around by dragging their boxes. For example, the minimap can be swapped with the content guide, while the squad/party interface can be swapped with the chat.

Secondary elements like the minimap, the chat window, the content guide, and squad/party interface are placed in the four corners of the screen, while primary elements are found in the center, with your selected target’s status on top, and your character’s skills, buffs/debuffs, and health on the bottom.
The various panels can be accessed from the top-left corner of the interface. The two most important panels in the game are the Hero panel and your Inventory.

Inventory
Let’s start with the Inventory, which is accessible by default with the “I” key. GW2 is very alt-friendly: all the currencies and materials you gather will be accessible account-wide, and your inventory panel even has Shared Inventory Slots that are accessible by all your characters and can be extended with gems.
A convenient aspect of item management in GW2 is the ability to deposit all crafting materials from your inventory into your account-wide Material Storage. This is accessible from Bank NPCs which are marked with ![]() on the map and are found in every major city as well as in a few other locations.
on the map and are found in every major city as well as in a few other locations.
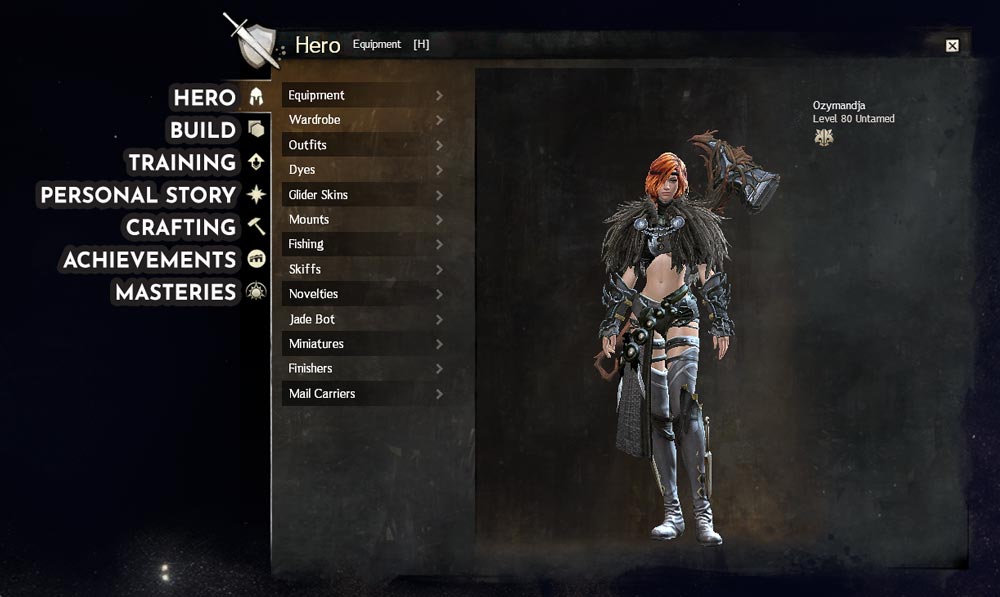
Hero panel
You can open the Hero panel with the “H” key by default. It is split into a few main tabs on the far left: the bottom two pertain to account-wide progression (Achievements and Masteries), while the rest pertain to your current character.
The two most important are the Hero and Build tabs. While the Build tab is simple, containing your current trait lines (specializations) and a summary of your unlocked weapon and profession skills, the Hero tab is more complicated and is split into even more sections.
Most of the options visible in the Hero tab are self-explanatory and handle the visual skin of the associated gameplay option. For example, you’ll find unlocked Skiff skins in the Skiffs panel, your acquired Miniatures in the Miniatures panel, Mount skins in the Mounts panel, etc.
The first four elements (Equipment, Wardrobe, Outfits, and Dyes) are the ones that directly pertain to your character’s gear and appearance.
In the Equipment panel, you can see all of your equipped items; check their stats and your total character’s Attributes; and equip Weapons, Armor, Trinkets, and gathering tools as desired. You can also change equipment templates by clicking one of the tabs at the top of the panel.

The Equipment Armory on the left side of this panel acts as virtual storage for all your equipped items.
When you equip an item, say in Template #1, it will leave your character’s inventory and become a part of the Armory instead. Once part of the Armory, copies of that piece of equipment can be equipped in any of your equipment templates for no cost. If you unequip the item from all templates, it will go back into your character’s Inventory.
While it may seem like an unconventional solution, this saves a lot of inventory space in the end!
You can change your character’s appearance in the Wardrobe, Outfits, and Dyes panels. From the Outfits panel, you’ll have access to full-body costumes: once enabled, your character will have that look across all Equipment Templates and independently from any equipped armor.
The Dyes panel allows you to recolor your character’s Armor, Outfit, Glider, Mounts, and Skiffs. Dyes are not limited-use and dyeing itself is free, but you’ll have to unlock each dye color first in order to use them. Some are rewarded by the Personal Story and as part of your characters’ birthday gifts, but you can also buy many of them from the Trading Post as well.
 And finally, the true endgame of every MMORPG: the Wardrobe panel, where you can change the skins of your equipped Armor, Weapons, Backpacks, and even Gathering tools!
You will have to unlock the skins you want to use first, which is done by binding items to your character or account by equipping or salvaging them, or right-clicking and picking “Unlock skin” from the context menu.
Keep in mind changing an item’s skin is not free: it will cost you a  Transmutation Charge
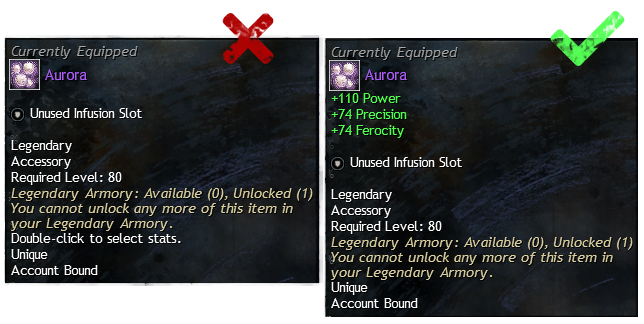
On the topic of equipment, you may notice that some items don’t have any stats by default. This is an indicator that you can select stats for this item, which is done by right-clicking the item and selecting Customize.
You’ll be able to select predefined stats. We will go into more detail on item stats in another guide.
Build and Training
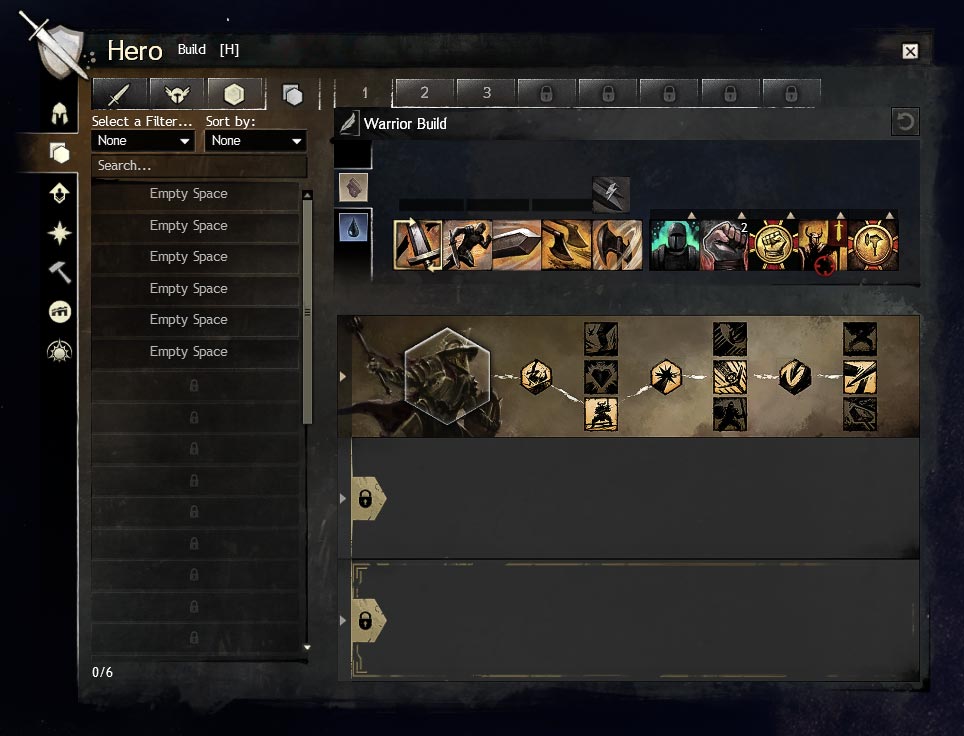
The Build panel is one of the most important aspects of the game, allowing you to set your character’s specializations and traits (known in other MMOs as talents). Traits change the dynamics of fights by altering your skills, allowing you to move faster, making attacks stronger, adding additional effects to your healing, etc.
You can select a specialization and traits starting at level 21, with your second and third specialization slots unlocking at level 45 and 71, respectively.
Traits and utility skills have to be unlocked first, which is done with Hero Points. These are awarded for leveling up and for completing hero challenges (marked with ![]() ), which are scattered across almost every map.
), which are scattered across almost every map.
Once you are ready, check out our builds for best builds for every game mode.
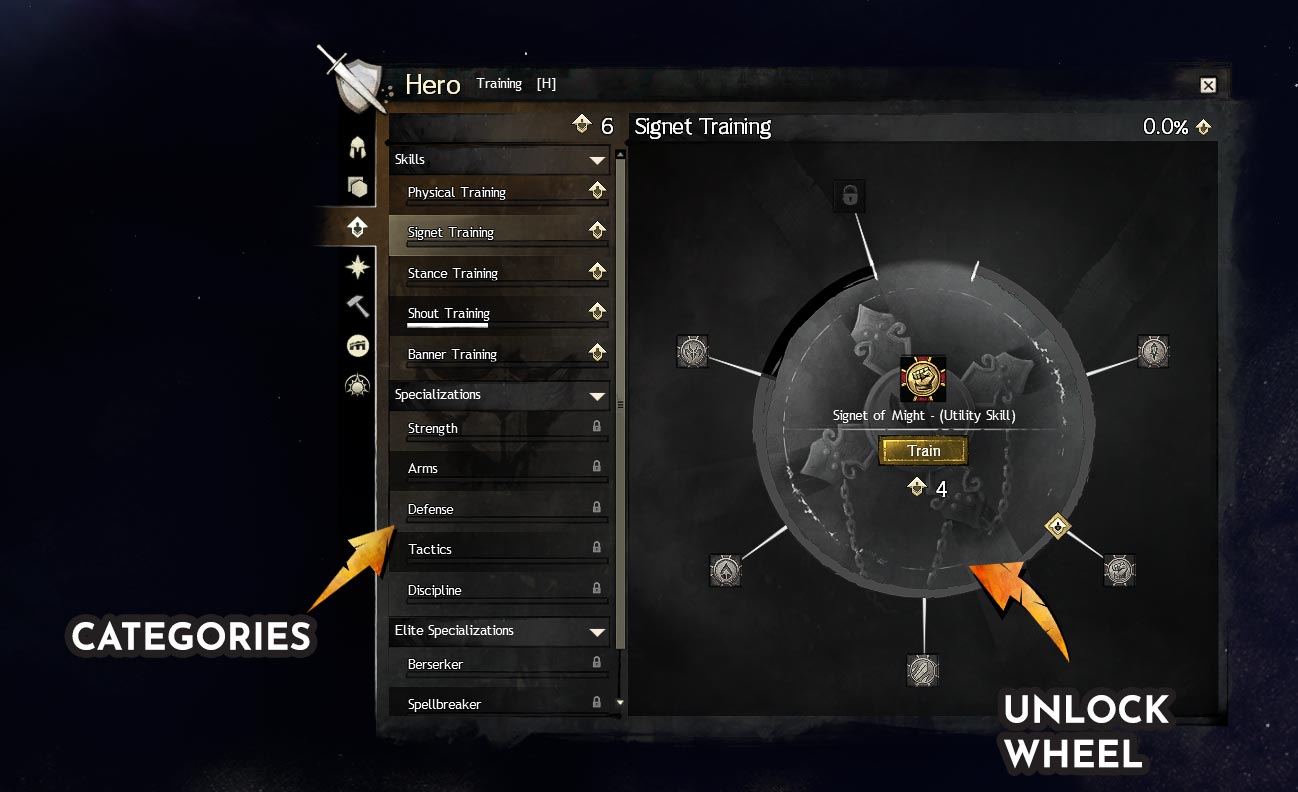
Once you have collected enough Hero Points you can start unlocking utility skills and traits in the Training tab.
Utility skills of the same type are grouped together and unlocked in sequence, with an elite skill usually capping off the set for an increased Hero Point cost.
Since the first specialization is unlocked only at level 21, it’s best to first invest in a few strong skills that will aid you the most.
What makes a strong utility skill? That’s not easy to explain without explaining what Boons, Conditions, and Stats are.
While these are covered in our detailed guide to GW2 systems and mechanics, it’s important to know Boons (known in other games as buffs) are very strong, and the ability to provide some key Boons like
Skills that give you
Here is a short list of good starter/core builds and good first skills and specializations to unlock for each profession offering good damage,
Recommended first unlocks:  "For Great Justice!"
 Signet of Might
Recommended first unlocks:  Elixir B
 Grenade Kit
Recommended first unlocks:  Sword of Justice
 Purging Flames
Recommended first unlocks:  Mantra of Pain
 Mirror Images
 Necromancer
 Well of Suffering
Recommended first unlocks:  "Sic 'Em!"
 Signet of the Wild
Recommended first unlocks:  Assassin's Signet
 Blinding Powder
Recommended first unlocks:  Glyph of Storms
 Conjure Lightning Hammer
Recommended first unlocks:  Vengeful Hammers
 Impossible Odds
Group finder (LFG)
If you are interested in group content, the MMO part of any MMORPG, you can use the in-game LFG (Looking For Group) system. This is accessible by pressing “Y” by default or by clicking the “Contacts and LFG” icon from the selection in the top-left corner of the interface.
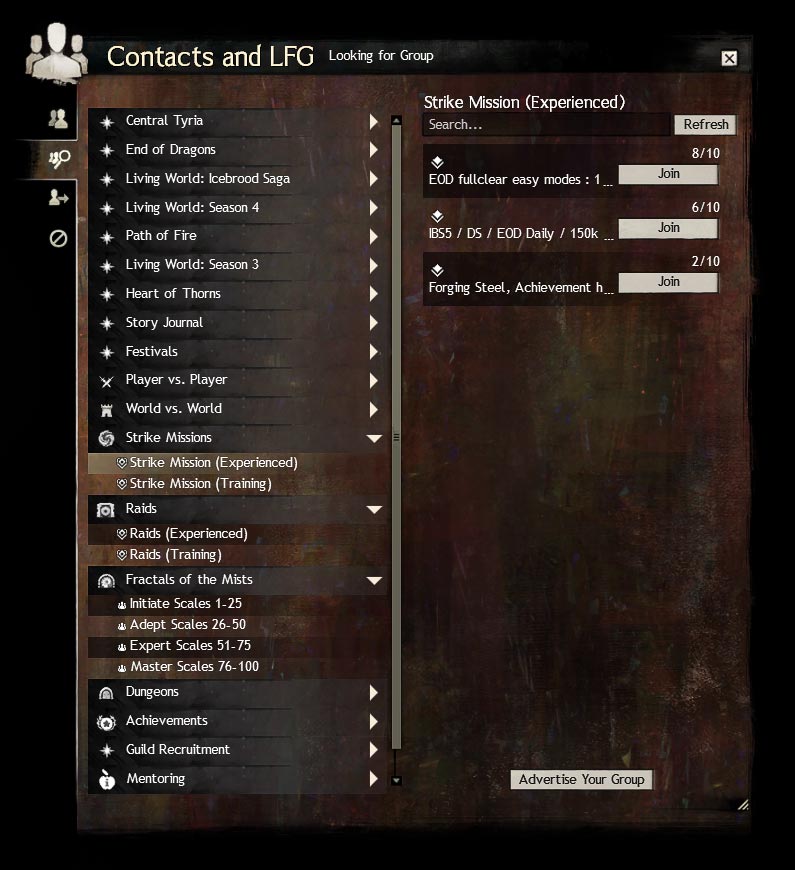
The second tab of “Contacts and LFG” is a very detailed Looking For Group system, which gives you the ability to browse through many different categories to match your current need.
Categories range from casual Mentoring, Guild Recruitment, and Role-Playing to Expansion-specific event organization or end-game activities.
When expanding each category, you will always see at least one subcategory; while each main category will have an icon related to the content type, subcategories can only have one of three icons, indicating what group type can be advertised there:
 – 5-player Party
- – Squad of any size
- – 10-player “Raid Mode” Squad
Each advertised group in a subcategory will have either profession icons indicating how many people joined the party or an x/10 (x/50 in case of large squads) counter on the right side showing how many people are in the squad.
After reading the description, if the group meets your expectations and you meet their expectations, simply press Join.
Note: You can filter the list by searching what you are looking for, but you can also eliminate some keywords by adding “-” before them.
For example you can type”-[ -sell” in the LFG search bar to remove all guild recruitments and sellers from Raids/Strikes category, or use “-dudu” if you are a self-respecting Druid.
Of course, if you prefer more structured and social methods of finding a group, you can look for Discords specific to a game type or general ones, like our Hardstuck discord.
Wiki
We can’t let you leave without mentioning the GW2 Wiki. While most games have wikis created by fans or by devs, the Guild Wars 2 Wiki is one of the most advanced and detailed MMO wikis out there.
The power of the wiki, outside of the amazing community updating it, is the wiki integration within the game. You can use the /wiki command to open up a generic Wiki page in your browser, or can query any item, any skill, any skin, and essentially anything else in the game.
By pressing Shift+Click on an item, you can paste an item/skill/etc. in the chat window.
Ctrl+Left Click will instantly send the item/skill with no confirmation instead, allowing others to see it in chat. This is commonly referred to as “pinging an item/skill/etc”.
By typing /wiki and then Shift+Clicking something you are interested in learning more about, you will be directly linked to its article on the GW2 Wiki.
Game systems and mechanics
You are now equipped with basic information to start your adventure in Tyria, but what about game mechanics? What stats should you pick, what are those heart quests, meta events, weapon skills, dodging, traitlines, boons, and conditions?
We’ll explain these and more in the guide below.


